 You might feel a sharp pull in your chest when you hear the words “dental implant.” You picture pain, long visits, and a long wait to feel normal again. You deserve clear facts instead of fear. This guide walks you through the 4 steps in the dental implant placement process so you know what will happen and when. You see how your mouth is prepared, how the implant is placed, how it heals, and how the final tooth attaches. You also learn how sedation dentistry in Green Bay can calm your body and mind during each step. You gain control when you know what to expect. You ask better questions. You make safer choices. You move from worry to steady confidence, one step at a time.
Step 1: Evaluation and Planning
The first step is a full check of your mouth and jaw. The goal is simple. Find out if an implant can hold strong in your bone.
You can expect three main parts.
- Questions about your health and medicines
- A full mouth exam and gum check
- X rays or a 3D scan of your jaw
The dentist looks for enough bone, healthy gums, and safe spacing from nerves and sinuses. The dentist also checks for habits like smoking that can slow healing. You might need blood tests or a note from your doctor if you have heart disease, diabetes, or take blood thinners.
Next, the dentist builds a step-by-step plan. This plan covers:
- How many teeth need implants
- If teeth must come out first
- If you need a bone graft
- What kind of implant and crown will work best
You talk about pain control and sedation. You learn what to expect on surgery day and during healing. Clear planning lowers risk and protects your health.
Step 2: Tooth Removal and Bone Preparation
The second step prepares your jaw to hold the implant. For some people, this step is quick. For others, it takes more time.
First, the dentist removes the damaged tooth if it is still in place. You receive numbing medicine in the gum. You might also receive light or deep sedation. That choice depends on your health, your fear level, and your past dental history.
Next, the dentist checks the empty socket. If the bone is thin or soft, you might need a bone graft. A graft adds support. It acts like a scaffold while your body grows new bone.
Common choices include:
- Bone from another part of your own jaw
- Processed donor bone
- Synthetic bone material
Healing from a graft can take several months. Your body slowly replaces the graft with your own bone. That steady process creates a strong base for the implant. The American Association of Oral and Maxillofacial Surgeons explains grafting and healing times in clear language on its education pages at myoms.org.
Step 3: Implant Placement and Healing
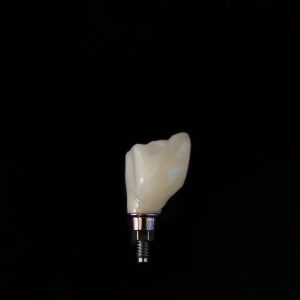
The third step is the actual placement of the implant into the bone. The implant is a small metal post. It acts like a new root for your missing tooth.
On surgery day, you receive numbing medicine again. You might also receive sedation so your body stays calm and still. The dentist opens the gum, shapes a space in the bone, and places the implant. Then the gum closes over or around the post.
The next part is quiet but important. Your body heals. Bone cells grow onto the surface of the implant. This process creates a tight bond. It usually takes three to six months.
During this time:
- You eat softer foods on the implant side
- You keep the site clean with gentle brushing
- You avoid smoking and vaping
You might use a temporary tooth for appearance. You still protect the implant from chewing forces until the bone is ready.
Step 4: Abutment and Final Crown
The last step connects the implant to a tooth that you can see and use.
First, the dentist places a small connector called an abutment on the implant. The gum heals around this piece. Next, the dentist takes a mold or digital scan of your teeth. A lab uses that record to build a crown that matches your bite and your other teeth.
Once the crown is ready, the dentist attaches it to the abutment. The dentist checks the fit while you bite, speak, and smile. Small shape changes can improve comfort.
You care for an implant crown as you care for natural teeth.
- Brush twice a day with fluoride toothpaste
- Clean between teeth each day
- See the dentist for regular checkups
Dental Implants Compared to Other Tooth Replacement Options
You might still wonder how implants compare with other common choices. The table below shows simple differences.
| Option | Stays in mouth all the time | Supports jaw bone | Typical use life | Daily care
|
|---|---|---|---|---|
| Single dental implant with crown | Yes | Yes. Acts like a root | Many years with good care | Brush and clean between teeth |
| Fixed bridge | Yes | No. Does not reach bone | About 10 to 15 years | Brush and clean under bridge |
| Removable partial denture | No. You remove for cleaning | No | Often 5 to 10 years | Daily cleaning outside mouth |
| Full denture | No. You remove for cleaning | No. Bone can shrink over time | Often 5 to 10 years | Daily soaking and brushing |
Questions To Ask Before You Decide
You protect yourself when you ask direct questions. You can bring this short list on your visit.
- How many implants have you placed
- What are my choices for pain control and sedation
- Do I need a bone graft and why
- How long will healing take for me
- What problems should make me call you right away
- What will my total cost be, and what does insurance cover
You deserve clear answers. You also deserve time to think. Dental implants are a long-term choice. With careful planning and steady care, they can feel secure and strong, let you chew well, and help you smile without tension.